Thursday, August 25, 2011

Helmet: Mandibles, RF, and Visor

Ears are done! Over the silver layer, I selectively sprayed a little bit of Rusto beige and Rusto Anodized bronze to match the movie helmet.  Then I used sandpaper and a screwdriver to give them some wear:


You'll notice the super glue on the RF housing below -- I dropped the damn thing and it broke. Luckily no little pieces to worry about. 


I also finished the RF antenna assembly, except for the two little LED lights that go on the top of the RF. I'll have to search Radio Shack for those. Here's the RF before painting.


And the finished pieces.


Next up, the mandibles.  Starting with the silver layer masked off:


Sprayed with Rusto Anodized Bronze over liquid mask...

Anodized Bronze layer with liquid mask removed:
After this I added another layer of liquid mask, and then sprayed a base coat of flat black, then misted with Rusto Indigo and a heavy mist of Rusto Dark Hunter Green.  Then another mist of flat black.  So the end result is a very dark, almost black, teal color:

The last major area to paint on the helmet is the red visor area.  I taped that off, added a layer of liquid mask, a layer of Rusto Anodized Bronze, and let that dry.  I peeled off the liquid mask, added a new layer of liquid mask to the damaged areas, and sprayed the top coat of Rusto Cabernet, misted with Black. Here it is, still wet. It dried to a nice dark wine color.


After it dried, I peeled off the liquid masked area, and added micro damage with a screwdriver.

I have some touch ups to do, then I'll spray the whole helmet with Testor's Dullcoat. And once I have final assembly finished, I'll post the completed helmet!

~N

Tuesday, August 23, 2011

Helmet: Back Finished!

After the base silver layer, I lightly sprayed some of my faux primer color (Rusto Anodized Bronze) instead of doing a solid layer of the faux primer.  In my movie refs, you can see that the back of the helmet has sort of a faded gray layer over the silver. I tried to imitate that as much as I could.  But as always, I first added a layer of liquid mask for the pure silver areas that would need to show through later:


After this, I sprayed a topcoat of Rusto Dark Hunter Green, and a mist of Valspar Peacock green, then misted with flat black.


Finally, I peeled off the liquid masked areas and added micro damage with a screwdriver and gravel from my walkway...and we have the final back panels:


To complete the back, I liquid masked and then misted the keyslot panel in the appropriate places with Rusto Anodized Bronze, and then attacked it with sandpaper and a screwdriver.


In the movie prop, behind the keyslots, is a glued-in replica of an old Casio circuit board.  I've ordered a couple from ebay. I'll worry about that during final assembly.

Next time: The mandibles and ears!

Thursday, August 18, 2011

Helmet: Dome and Cheeks

Work and life have kept me pretty busy over the last couple of weeks, but I have an update for you.

I painted the cheeks and dome of the helmet...THREE times.  The first time I had a problem with the paint, and it peeled off in the wrong places.  So I sanded it down and started over.  The second time, I finished all the layers of the cheeks and dome and the color just wasn't right.  It was too minty green.  So I sanded THAT down and started over.  What you see here is the third round of painting. Anyway, back to the show...

This is helmet #23 by Terminal Fettler. I managed to score it on eBay. TF doesn't make helmets anymore I'm told.

First I removed the lens, the right ear piece and the antenna. We'll deal with those later.


I had to trim out and sand the key holes in the back with a set of jewelers' files.


Here are the key holes all finished:


Next I sprayed the whole thing Rustoleum Aluminum (Forgot to take pics of that stage...) and added some damage with liquid mask using movie reference photos. Once that dried, I sprayed the gray layer with Rusto Anodized Bronze misted over with Rusto Slate Gray.  Once that dried, I peeled off the liquid mask and...


Another layer of liquid mask was added so that some of this gray would show through.  Then came the top layer of green.  The base color was Rusto Oregano, misted heavily with Rusto Spruce, and then mists of Anodized Bronze and Black.  This was the most fussy I've been so far with trying to get just the right color.

 
Once that dried I added layer upon layer of grime with various dark colored Testors paints.  This was several hours of work dry-brushing, and using papertowels, etc. to make it look like the helmet has seen some serious use.  Finally I peeled off the liquid mask to reveal all the major damage underneath, and then added micro damage with a screwdriver and my gravel driveway!

The next step was to add the kill stripes to the left side of the helmet.  A lot of people use vinyl decals -- and I bought some -- but I really wanted to use paint. So I made an elaborate mask with frog tape, and mixed up some orange Testors enamel, and brushed them on.


And we have our final dome and cheeks all finished. You'll note the shade of green changes depending on the angle and light source.  The frontal pic below is the most accurate real-life color.


The orange looks WAY brighter in these pics than they do in real life... darn iPhone.


Next up, the back and the stripes under the visor.

~N

Monday, August 1, 2011

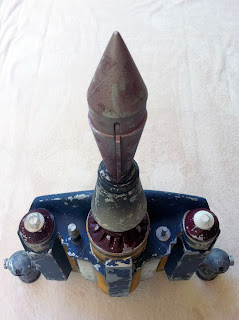
Jetpack FINISHED!

 High-res completion photos of the finished pack!


Two moths of painting DONE! The only thing left to do on the jetpack is add the harness hooks -- but I can't do that until I get the rest of my armor in (so I can be sure that the hooks line up with the harness holes of the back plate).  I'm going to take a few days break and then get going on the boots.  Hopefully by then my armor will start showing up in the mail!

~N